In this Blog post I am going to explain how to move the SharePoint list attachments based on the scheduler and the item sechduled date reached to current date.
Lets start with step by step procedure,
Login to Flows.microsoft.com and select the template as Recurrence and do the configuration as per the requirement, here I have configured the scheduler which runs at every day morning 8:30 AM IST.
Then get the current date by assigning to variable, the format will be formatDateTime(utcNow(),’yyyy-MM-dd’)
The next step would be filter the items based on the current date,
Once you get the items then we need fetch item attachments one by one,
Once we get the attachments then we need to upload the attachments on the Document library,
the above steps will move the attachments on the selected destination library, still if we need to update the document metadata properties please do the below additional step,
Select Send an HTTP request to SharePoint then do the below configuration,
This will update all the source item metadata properties on the document properties.
The same way we can do the configuration for SharePoint list items as well, here is the supported Blog with detailed steps.
In this post, I am going to explain how to upload SharePoint list item attachments in the Document library using MS Flow
The initial requirement whenever a new item is created I need to pick the attachments and move to dynamic library, let me explain the step by step procedure.
Recently I got a requirement from the business that we need to integrate the data from SQL to Thrid party API, the data should be sync on daily basic so I have used API Management service and Logic Apps.
Let me explain step by step about the integration procedure,
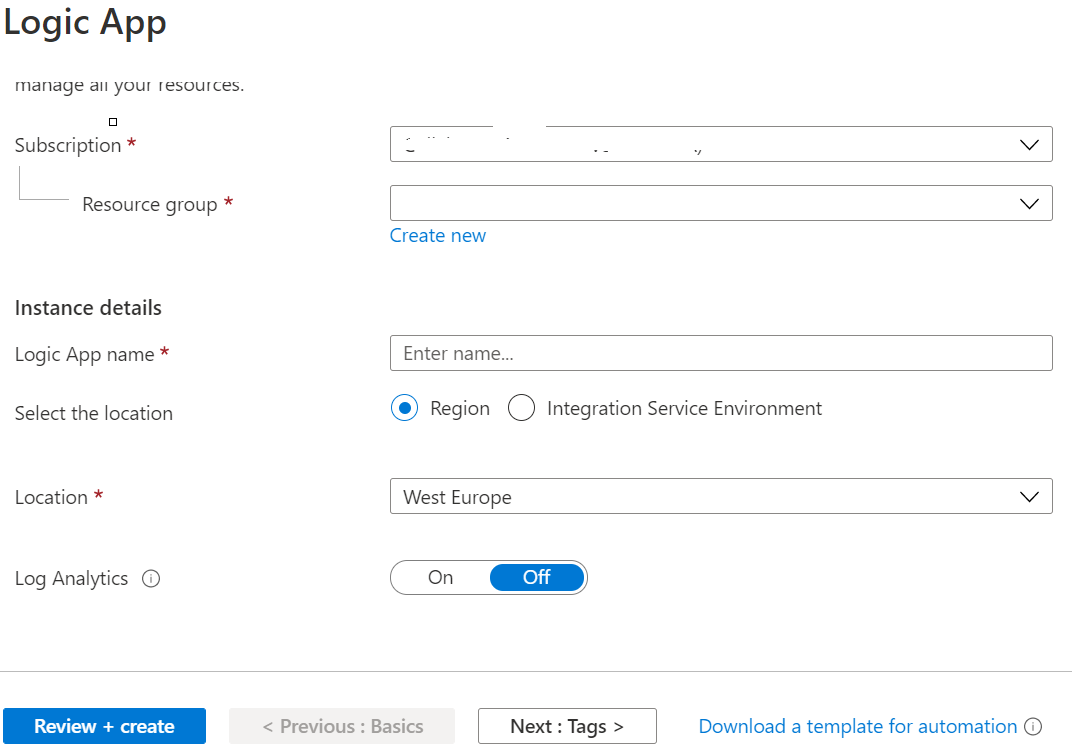
select the Region, provide the required field values and finally select the Pricing tier and other settings keep as is then create it, might it will take a couple of minutes to complete the creation process, please wait till the process complete.
Once it’s created successfully please open the newly create one and Add new API by selecting the available template, here I have API which in WSDL format so I have chosen WSDL API template.
Once you select the WSDL will open a form, provide all required information and create it.
once the creation completed by default it will populate all the inbuilt methods from the API, please select the required method and do the configuration as per the requested API, please use the below steps to add the Headers and Request values,
Once all the configuration completed please navigate to Test tab by selecting the required method and copy the below values.
Note: By default the subscription key will not display, please click on the eye icon then copy the value.
Step 2: Create a Logic App to update the data based on the schedule
Here I would prefer to use the same Resource Group and Location for both API Management service and Logic App because once you done the development it’s easy to move to Production subscription.
Open the newly created Logic App and select the Designer part and add the Recurrence step, and do the configuration as per the requirement here my requirement is needed to run every day at 5 am.
Now add one Variable to get the current date -1 dynamically to filter the data form SQL stored procedure, the expression will be : addDays(utcNow(),-1,’dd-MM-yyyy’)
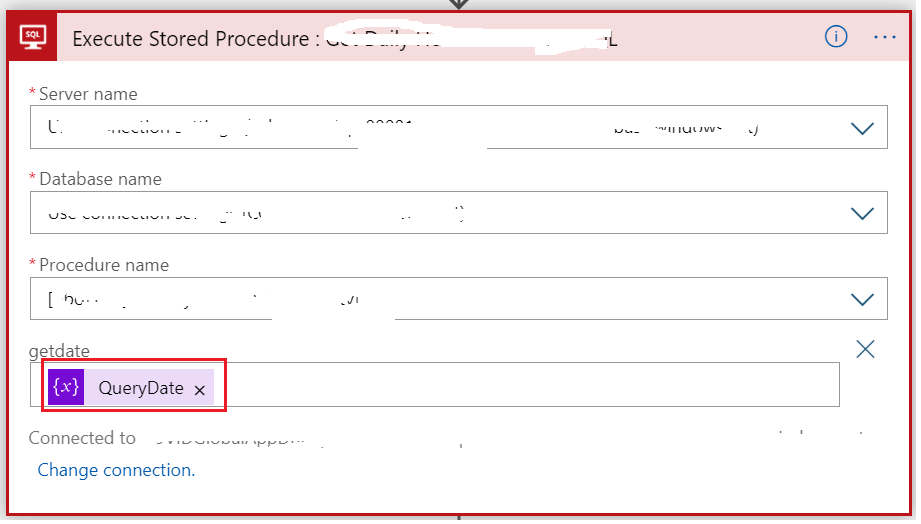
Now add the Execute Stored Procedure and do the below configuration, here select the property getdate ( from SQL procedure ) and provide the variable value.
Now we have the complete response, the next step add the ForEach and do the below configuration, here I am parsing the date value form the result to do that please use the below format,
replace(items(‘For_each’)?[‘SubmittedDate‘],’-‘,”) ( SubmittedDate will be table SQL table column which stores the submitted value )
Then select the HTTP to send the request,
Note: The URI, Headers values will be API Management service value which we have created on Step 1.
Body is kind of response which will provide by the customer, here we need to provide the dynamic parameters to update the values.
I just want to add a couple of additional steps here, for example if we want to do integration with other API also please append the below steps.
Inside the For each add condition to compare if the value is null execute the alternative step,
In this case, if we want to execute 2 steps, the above steps will execute as is on else case need to get the other value please add HTTP request and capture the response to Variable
Once you get the response as Body to split the result use the below expression,
By default when you create SharePoint modern page Banner/Title area will be added to the page.
Unfortunately so far there is no option to hide/display the area manually, let me explain bit clear on this when you create a any modern site the site home page layout will be set as Home and for newly creating pages it will be Article.
We don’t have option to change the page layout, the only feasible solution we can control through PowerShell script.
#Connect to the site Connect-PnPOnline https://XXXXXX.sharepoint.com/sites/XXXXX #List all pages, and find the id of the modern page Get-PnPListItem -List SitePages #Change layout from “Article” to “Home” to remove top banner here 2 is the Page ID Set-PnPListItem -List SitePages –Identity 2 -Values @{“PageLayoutType”=”Home”} #To revert back the page layout to Article Set-PnPListItem -List SitePages –Identity 2 -Values @{“PageLayoutType”=”Article”}
After the commands executed successfully the Banner/Title will be hide from the page.
How to copy the Pages from the SharePoint modern sites
From the SharePoint modern site pages library you can’t download the pages even if you have the SCA access, to perform this there is workaround please generate a URL to download the specific file.
SiteCollectionURL/_layouts/15/download.aspx?SourceUrl=SiteCollectionURL/SitePages/default.aspx [ Default : page name ]
Whenever we need to perform the cleanup activity on Office 365 tenant are might sometimes we required to get the SCA access on all SharePoint sites for specific users. To achieve functionality I have built a PowerShell script which will provide the consolidated report with all site collections.
Let me explain the execution steps, before using this script please make sure to create a Client ID and Secret values with tenant-level full control access.
Here we are going to execute the script using a Client ID and Secret values because though if you are the Global Admin also you might don’t have access to most of the site collections.
Here is the execution script to get the list of information,
$TenantUrl = ‘Tenat URL’
$LogPath = ‘C:\AllUsers.txt’ #Replace your path to store the site collection report
Recently I got one requirement that has to redirect the user from old modern site collection to new modern site collection and the old site should accessible for Full control and SCA user permissions.
Generally, in Office 365 classic sites, we can develop this redirection functionality on the master page, that will handle the redirection part but when comes to modern sites there is no master page or manual script injection functionality is deprecated.
To achieve this Microsoft provided the new feature called SPFx Application Customizer, through this approach we can deploy our custom redirection functionality which will execute on all the pages quite similar master page placeholders.
Here I am dynamically controlling the redirection values form custom SharePoint list created on a centralized site collection, before implementing the functionality create one SharePoint list by following the columns,
Title : /sites/XXXXX [ Old site collection relative URL ]
Redirection URL: New site collections value
Note: Create this list on a separate site collection, for each and every site collection place one entry on this list.
Let me walk through the code,
Create an SPFx Application Customizer, and place the below code on .ts file
In this blog post, I will explain how to scan Office 365 site data using a modernization scanner.
Using the SharePoint Modernization scanner you can prepare your classic sites for modernization. The scanner will help you prepare for the following modernization efforts:
Optimizing the usage of modern list and libraries
Connecting these sites to a Microsoft 365 group
Modernizing the wiki and web part pages by creating modern site pages
Rebuilding classic publishing portals as modern publishing portals
Understanding where classic workflow is used
Understanding where InfoPath is being used
Understanding the usage of classic blog pages
To get the information please follow the below steps,
Step1: Download the modernization scanner tool using the link.
Step 2: After successful download open it by Run As administrator.
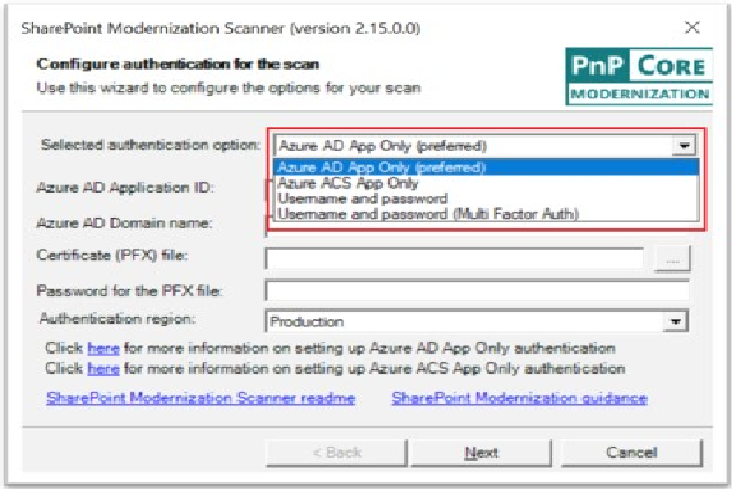
Step 3: It will prompt a tool with different authentication options, select the suitable option if you want use Client id and Secret provide tenant-level full access, or if you want to use any service account make sure the account should have full control in all site collections.
Step 4: Select the site collections options, we have multiple options available Tenant/selected sites/from CSV file and provide the tenant name (the only name don’t include -admin )click Next.
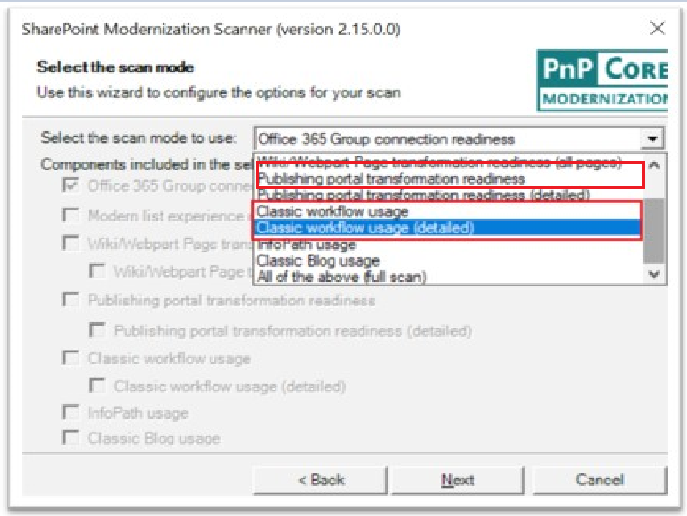
Step 5: Select the scan mode form the dropdown based on the requirement and click Next.
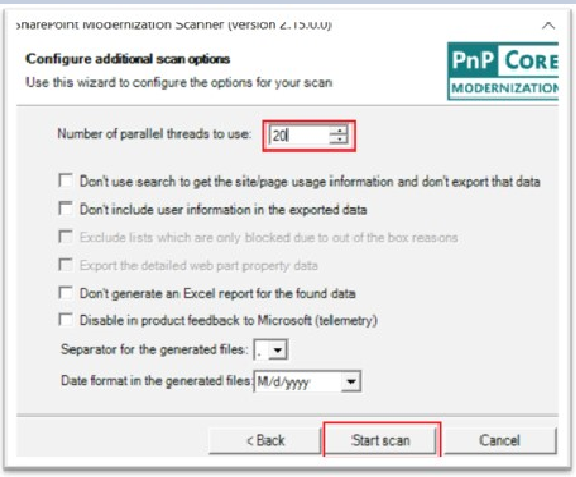
Step6: Then finally update the Number of parallel threads to use 20 by default it will be 10 and click Start Scan.
Finally, once the scan completed a new folder will be created from where you are executing the tool and will place all the reports inside the folder.
There are two options are available to create a registration forms using Power Apps.
From SharePoint list there is one option called Customize forms, by using this option we can create and replace the default list new form.
From the portal there are two options available Canvas and Model-driven, in this blog post I am going to explain how to create canvas forms, which will save the data to SharePoint list using custom validations.
Let’s start with steps how to create the canvas form,
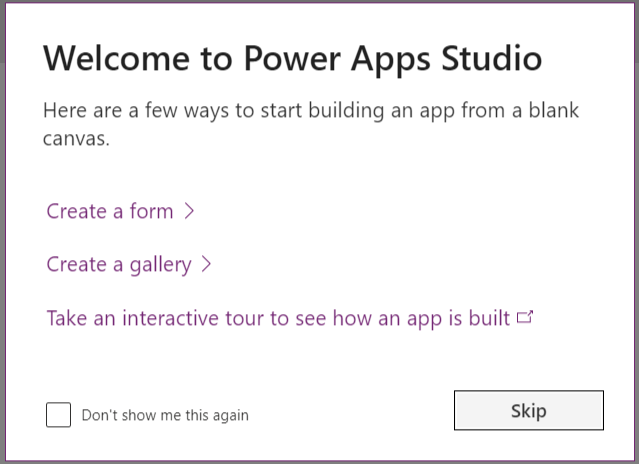
Open the site http://make.powerapps.com/ –> select the template Canvas app from blank –> Select the deviceTablet/Phone and provide the name of the form and finally click Skip Option,
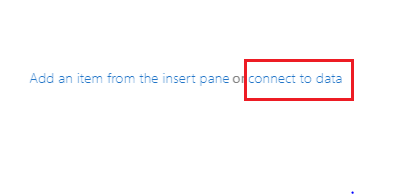
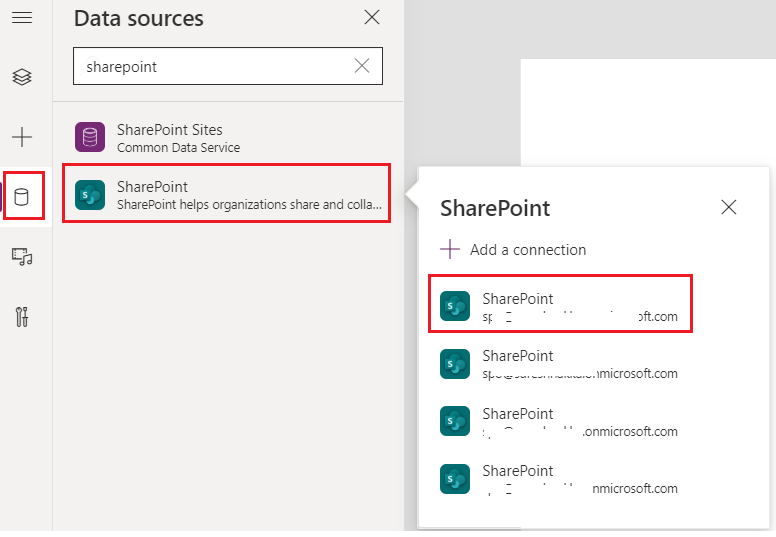
After that click on the Connect to data,
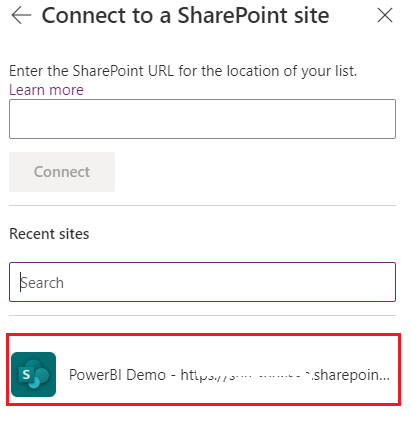
After connecting to the data search SharePoint and connect to your Site and list,
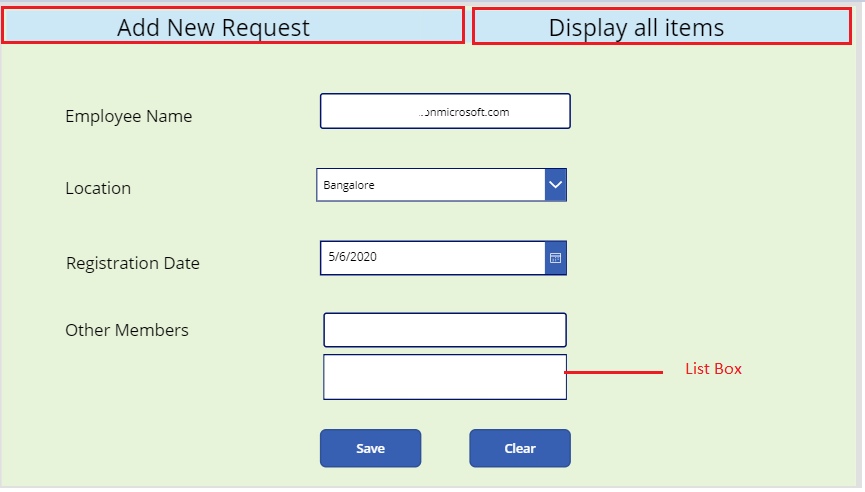
After establishing a connection you can design the form as per the business requirement, the below screen I have added only few controls to save the data in SharePoint list,
On the top I have added two labels On Select event I am navigating to Screen 3 Navigate(Screen3).
Employee Name field by default it will populate current user email: User().Email
Location is the Dropdown value which the values are binding from the sharepoint list column.
Registration Date : the fields is populating by default the current date : Today()
Other Members: In Power Apps there is no direct functiantliy to get the users like people picker control to achieve we have to do some work around,
Add Text box control on top of List box, and set the below properties to it:
Default – SelectedUserEmail
OnSelect – Set(ShowUsersListBox,true)
Add List box controls and set the below properties to it:
( Before this establish connection to Office 365 users by using the Datasource option )
Save button: OnSelect : If( !IsBlank( TxtMember.Text ),Patch(‘ListName‘,Defaults(‘ListName‘),{Title:TxtEmpname.Text,Location:DdlLocation.SelectedText,Requested_x0020_Date:DtDate.SelectedDate});Navigate(Screen2);Reset(TxtEmpname);Reset(DdlLocation);Reset(DtDate);Reset(TxtMember))
Display all Items (label) : OnSelect event : Navigate(Screen3)
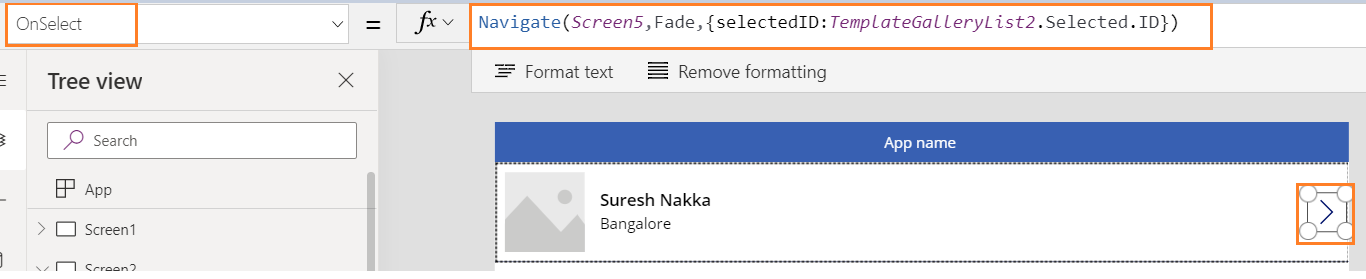
NewScreen3: This screen added by selecting the List design and the Datasource ( you can find this option from the right side properties ) is required sharepoint list.
On the new screen the items will be displaying in the list view, Navigate(Screen5,ScreenTransition.Fade,{selectedID:TemplateGalleryList2.Selected.ID})
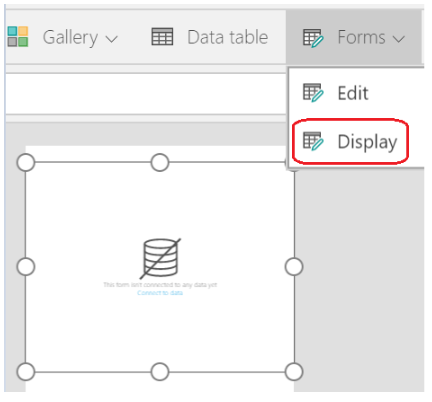
Again go back to Screen5 click on the Insert –> Forms –> select Display option
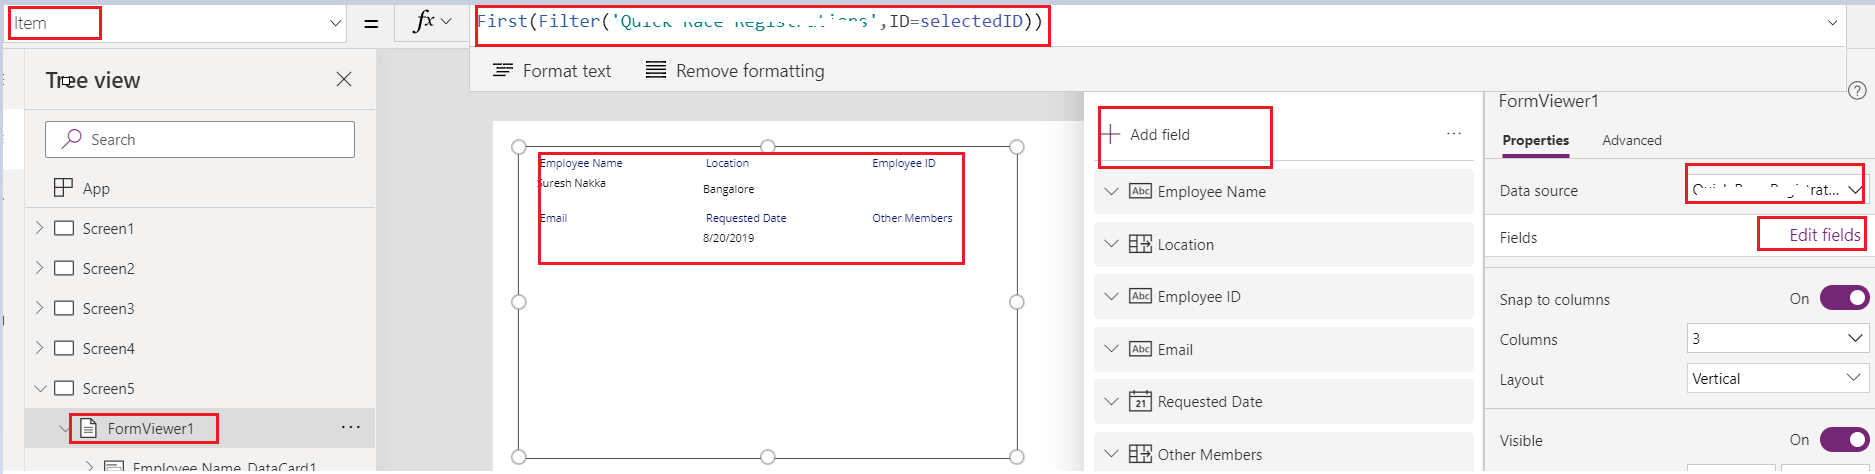
Now click on the connect data –> from the left panel you have to select the Data Source as the table name –> then click on the Edit fields inside the Data source dropdown –> from the new panel click on Add field –> now choose which fields should be displayed on the newly created form –> finally click on the Add button. On the new screen 5 Item event First(Filter(‘Quick Race Registrations’,ID=selectedID)) to filter the result.
After all configuration completed publish the Power app.
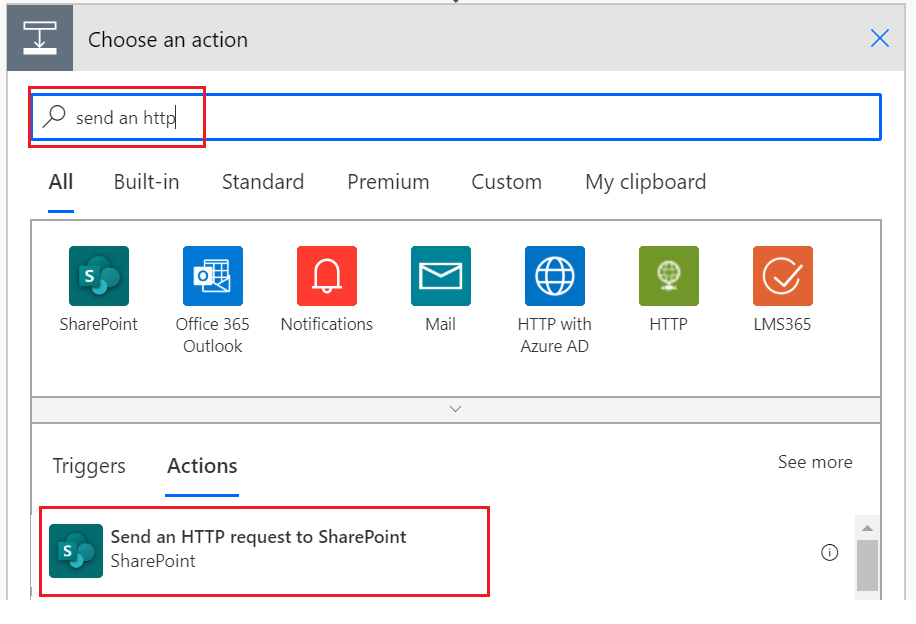
While working with Microsoft Flow there is no direct option to retrieve the users from the SharePoint group, if you have any requirement to send a notification emails to the all users under the SharePoint group there is one separate action called ‘Send an HTTP request to SharePoint’ using this action you can call the SharePoint REST API and perform all sorts of operations.
By using the API, you can get all users in a specific SharePoint Group with the following REST call,
Let me explain step by step procedure to retrieve users, here I am sending the notification to group users when a new item is added to the specific list.
Steps:
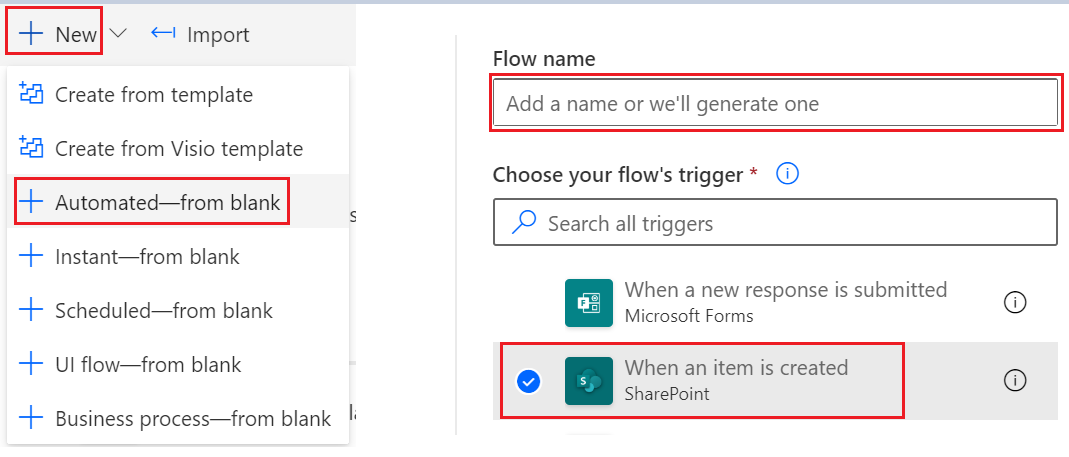
Login the Url https://flow.microsoft.com/ and create a template and select When an item is created and provide the Flow name,
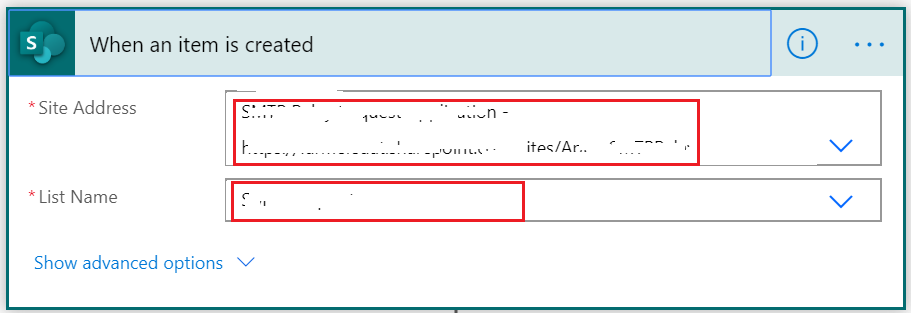
Configure the site and list value when an item added the flow will trigger,
Add the ‘Send an HTTP request to SharePoint‘ action and configure it so that you call the API as stated above.
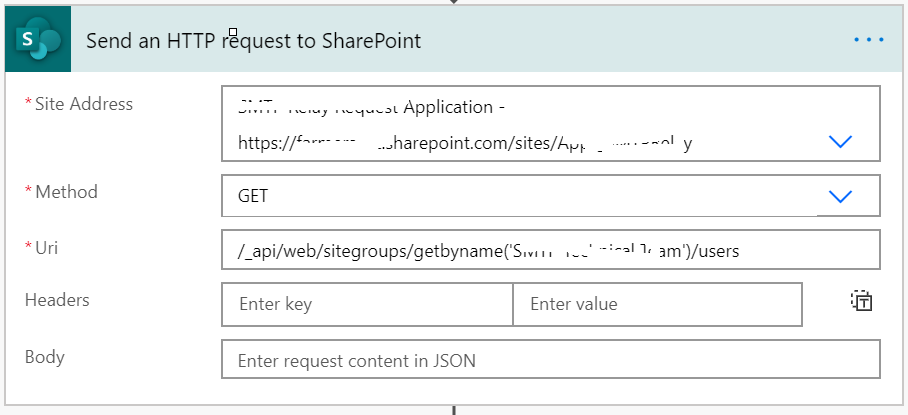
After selecting the template to configure a group name to retrieve the users,
Site Address: Site Collection URL
Uri : /_api/web/sitegroups/getbyname(‘groupname‘)/users
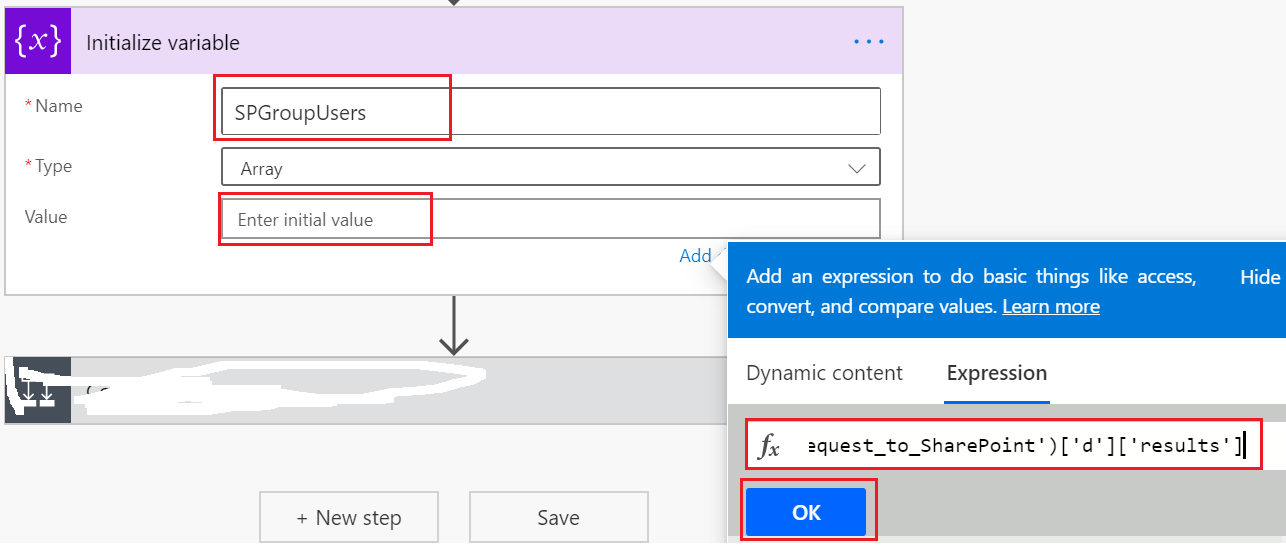
Initialize variable ‘SPGroupUsers‘ as an array type and the value should look like this,
body(‘Send_an_HTTP_request_to_SharePoint’)[‘d’][‘results’] use this syntax under the Expression tab and click OK.
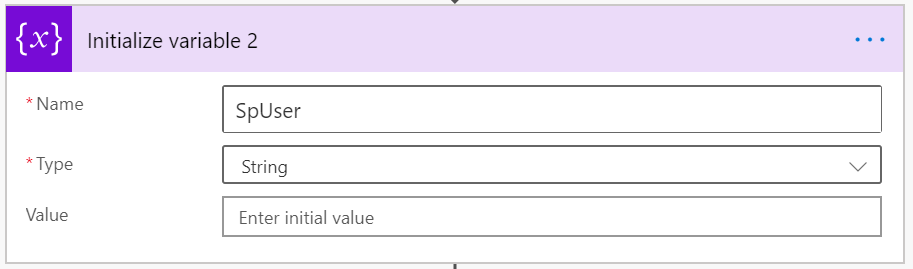
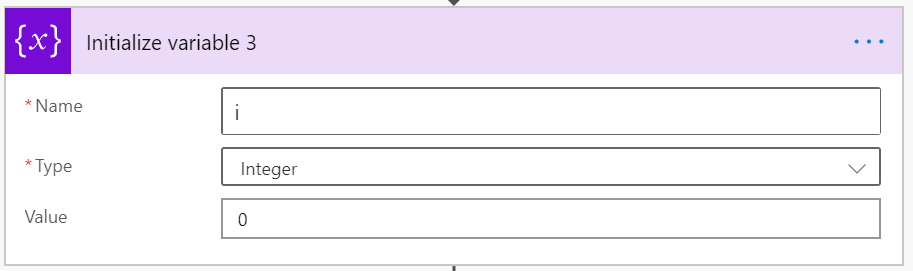
Intialize two variable one to store the all users email values and second to increment the integer value,
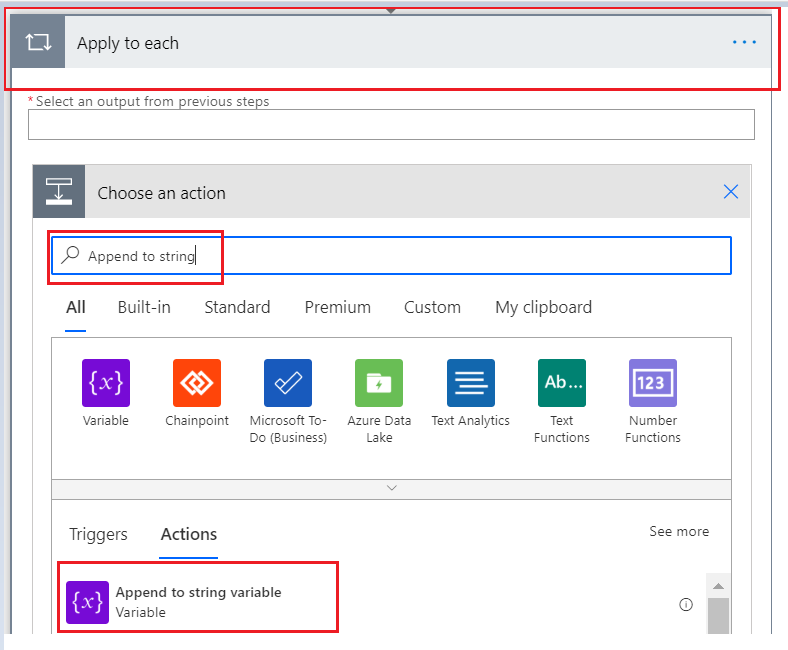
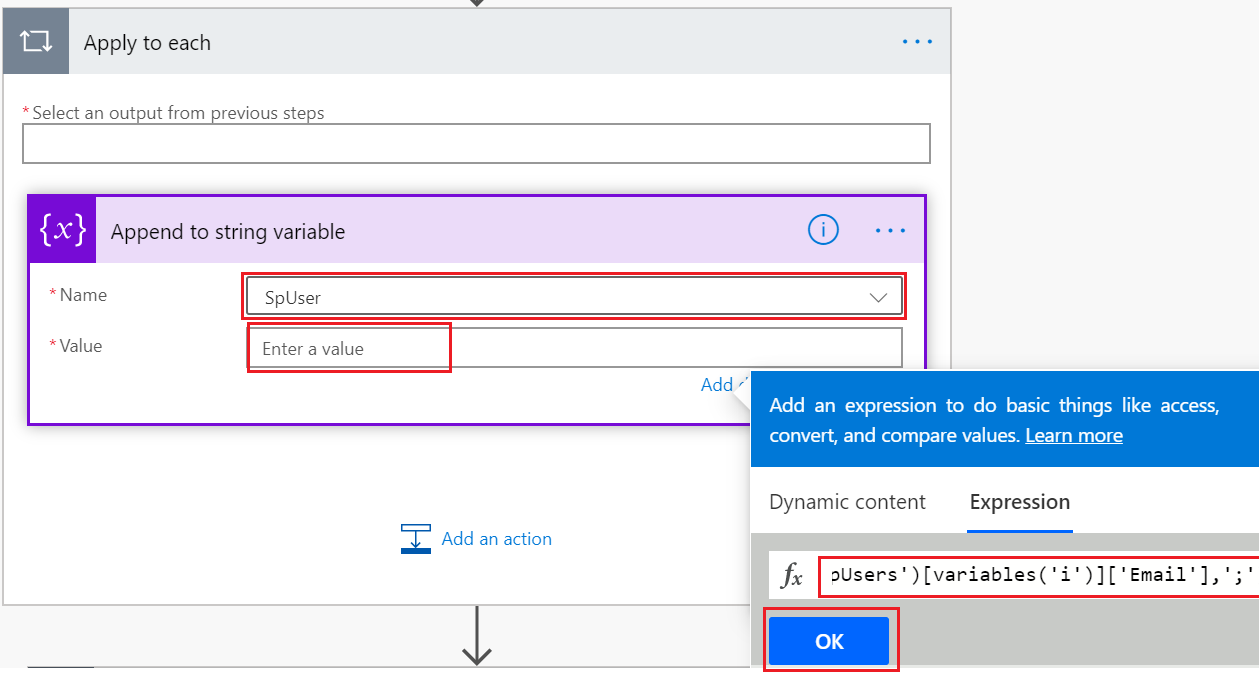
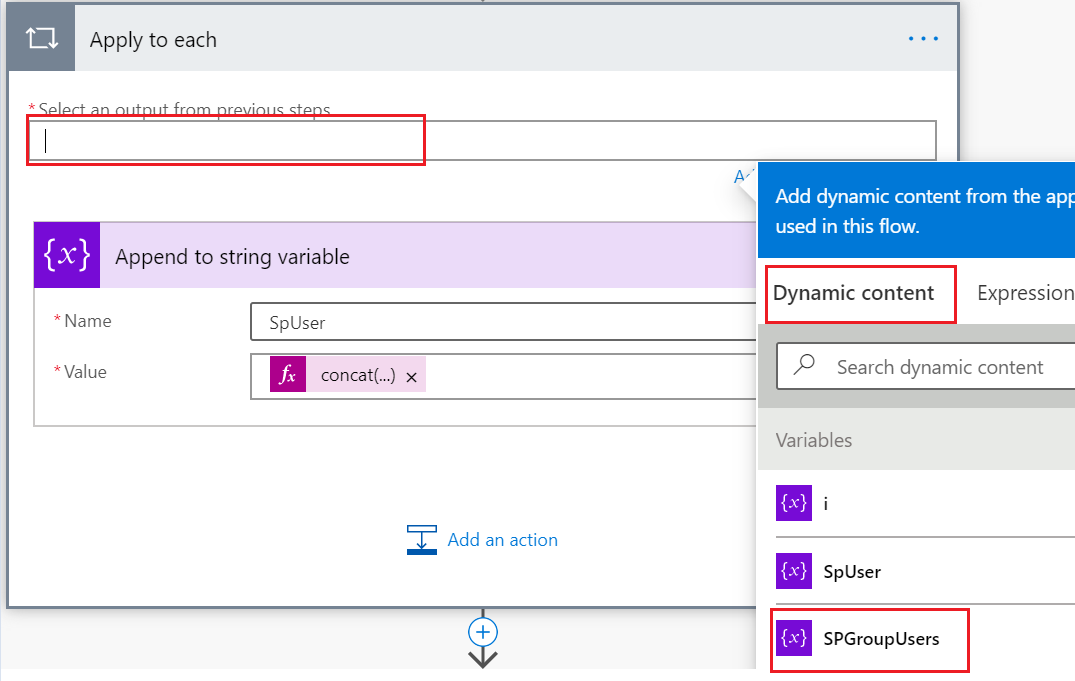
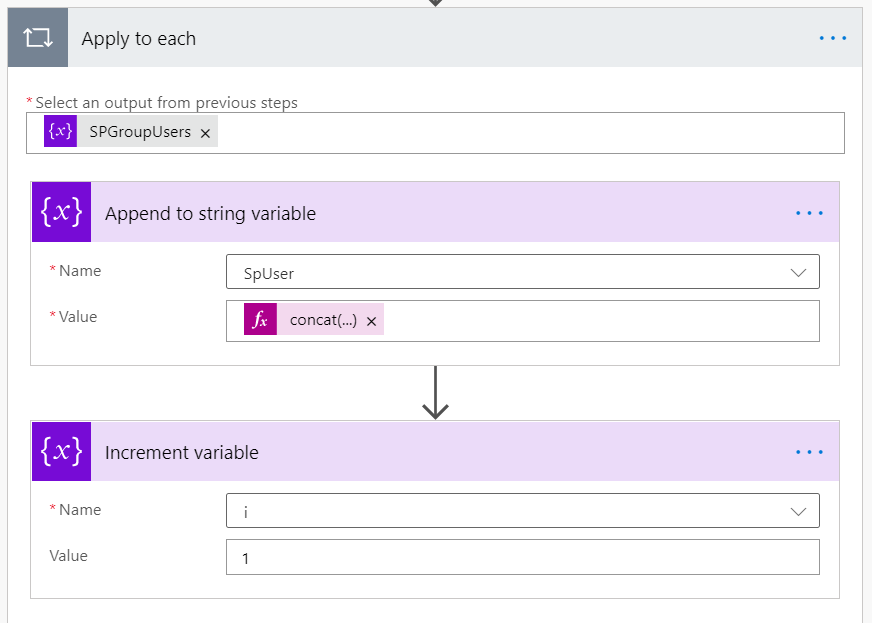
Add Apply to each and add ‘SPGroupUsers‘ in output which we created for array, and add Append to string action,
After adding the variable select increment variable and under the Append to string variable,
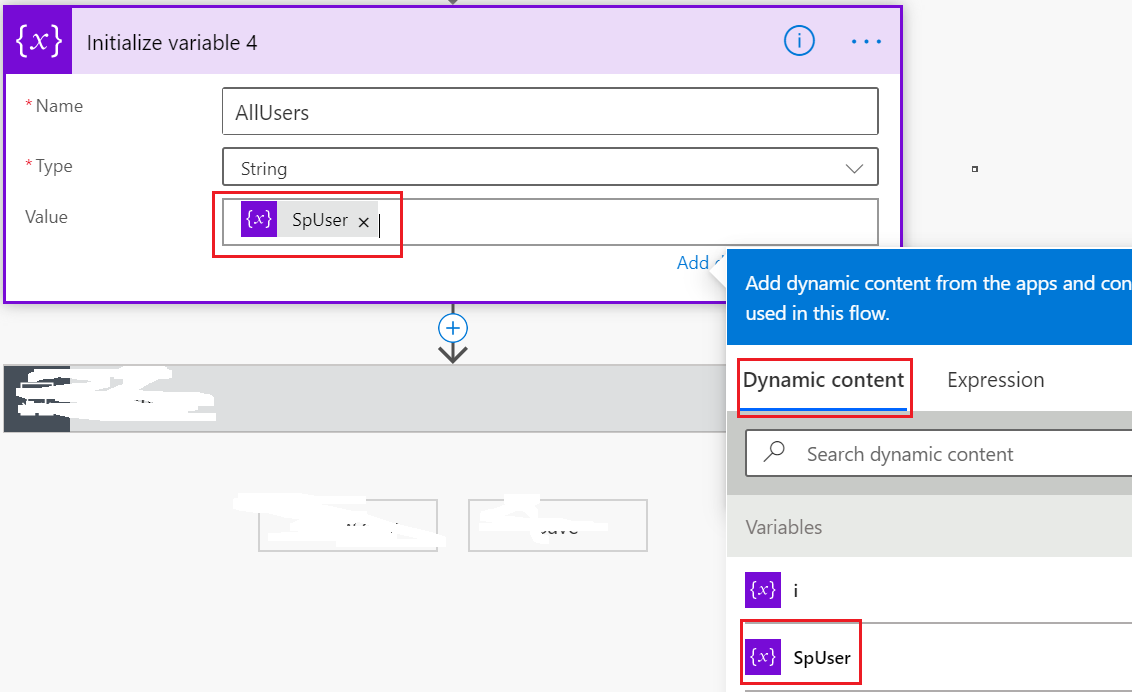
Finally Initialize new variable and set the value to it.
Finally AllUsers variable is having the all SharePoint group users, so if you want to send an email simply use the variable wich will sent to all users.
In this blog post, I am going to explain how to perform the SharePoint items as banners.
Here I have provided two solutions, the first one is manual configuration based on the web part property values single banner will be rendered on the page if you want to display multiple banners on the page need to configure multiple web parts with the required values, here is the example of how to configure the properties from SPFx web part,
Once the configuration completed a single banner will be placed on the page which looks like,
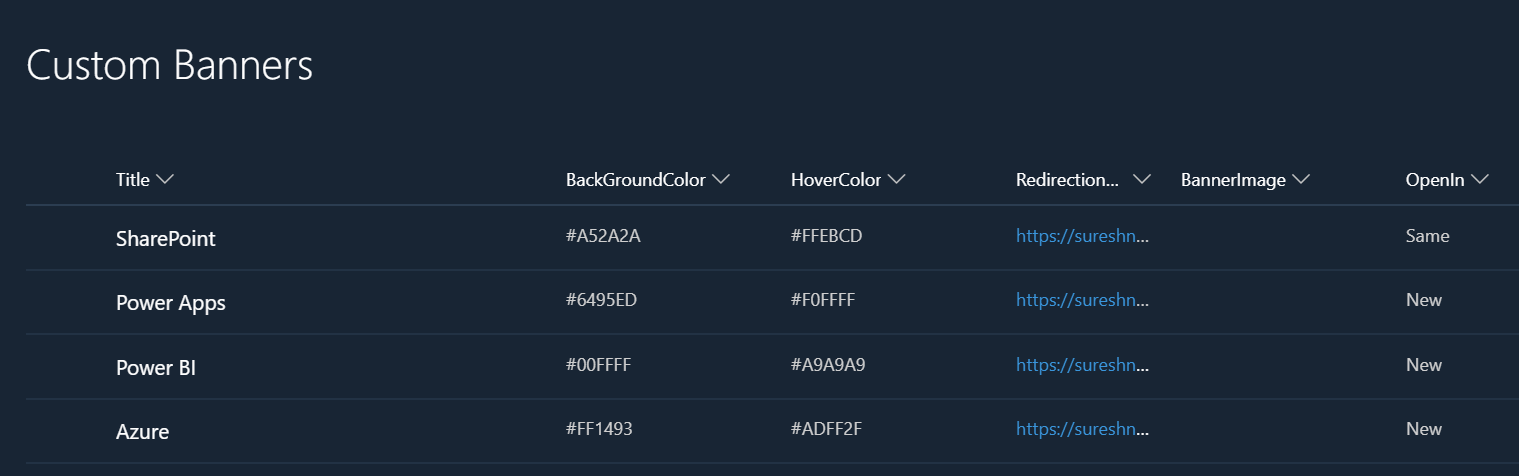
Let’s come to a second approach here I used to display the items from the SharePoint list,
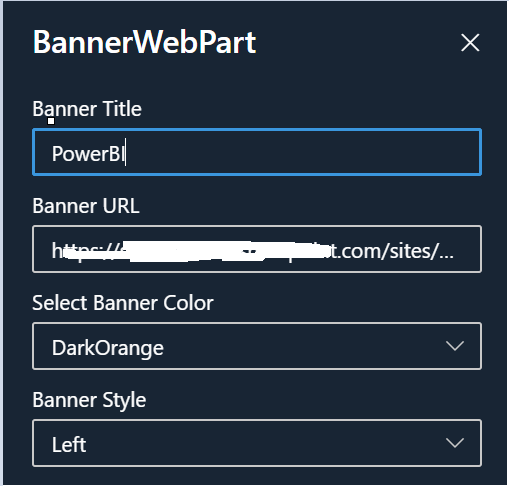
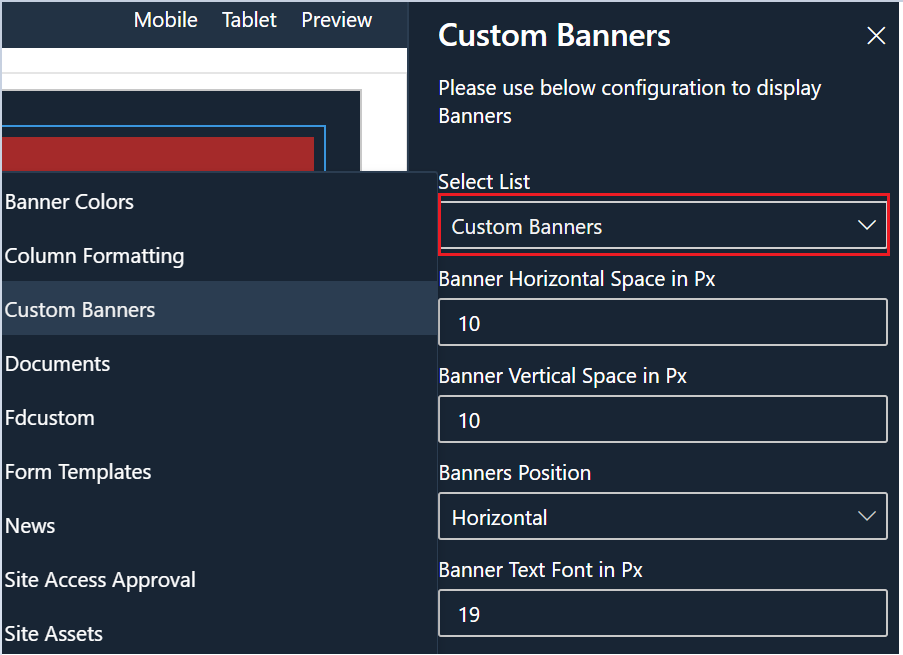
From the list, I have created several columns to configure the banner properties, after adding the items on the SharePoint list, edit the page and add the web part and do the below configuration from the property values.
From the above screen, the first property Select List will populate all the available lists except hidden within the current site collection.
After selecting the list there are some additional configuration properties provided to control the banners on the page after the configuration is completed all the selected list items will be renders as a Banners as per the below screen.
If you observe on the above slide there is space between banners, Font size, and the other things are displaying based on the web part property configuration values.
I have uploaded the complete code files on the link.